Aperture & Depth of Field Explained
The aperture is a ‘hole’ located inside the lens. Also known as the diaphragm, this hole is formed by a series of overlapping metal blades. Adjusting the size of this hole to different f/stops allows more or less light to pass through the lens and onto the sensor (or film).
F/stops are numbers that relates to the size of the aperture opening. I explain more about them in my blog post about F/stops. Here’s a list of your F/Stop numbers.
1 1.4 2 2.8 4 5.6 8 11 16 22 32
Depth of Field
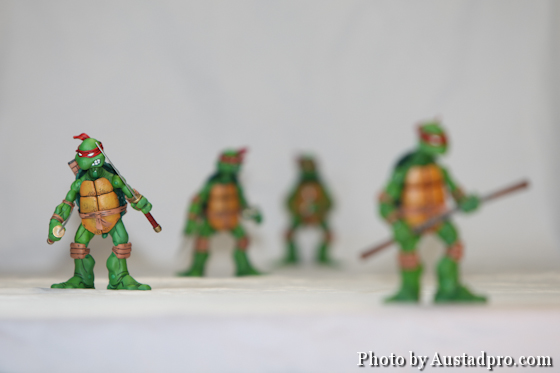
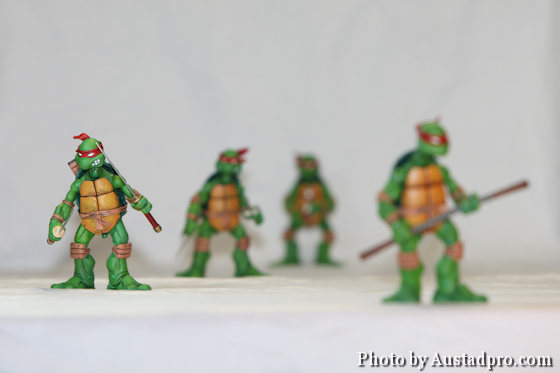
When you change the size of the aperture you also affect the Depth of Field. Depth of Field describes the area within a photograph that is in focus (Front to Back). By adjusting the size of the aperture you can increase or decrease the depth of field within the photograph. The two images below demonstrate depth of field.
The photo above was shot with an aperture of f/2.8. Notice that the figure to the left is in focus while the other 3 figures are out of focus. An aperture of f/2.8 is a wide open aperture and gives you a shallow depth of field. Only subjects that fall within this field will be in focus. Everything closer to the lens & farther behind this field will be out of focus. Imagine a gradient effect. The greater the distance an object is from this field (forward or back) the more out of focus the object will be. The figure farthest in the background is more out of focus than the figure just in front of it.
This photo above was shot with an aperture of f/32. Notice that much more of the image is in focus. An aperture of f/32 is a small opening which gives you a greater depth of field. Although the depth of field is larger, it still isn’t large enough that all four figures are ‘sharp’. That is because the aperture isn’t the only factor when working with depth of field. I will discuss more factors later in this blog post.
How am I going to remember that? Here’s an Analogy
Imagine you have a can of paint and an empty bucket. You take the paint and pour it through a funnel with a small opening into the bucket. Now imagine you pour the paint into the bucket without a funnel. Without the funnel, the paint quickly enters the bucket, but it splatters everywhere, with the funnel, it may take longer, but it enters the bucket cleaner and more is contained. The aperture works like a funnel. When the aperture is wide open, a lot of light floods in, but splatters on the sensor (or film) causing it to blur. When you close the aperture it funnels the light in cleaner, giving you a sharper photo. Now this isn’t scientific explanation, but it can give you a good way to think of it.
Other factors that affect depth of Field
Say you want to take a photograph where your subject is in focus, but the background is out of focus. The first thing you would do is choose your f/stop. You’ll probably want to use f/5.6 or less. The larger you can open the aperture, the more pronounced the effect will be. But the aperture alone doesn’t determine your depth of field.
Focal Length
The Focal Length of the lens has a part in determining how gradual the depth of field changes. Wide Angle focal lengths have a greater depth of field than a telephoto focal length. To get the effect we’re looking for, grab a telephoto lens. Preferably 70mm or more. With a 200mm or 300mm lens you will really be able to see a difference in depth of field.
Distance from Camera
Now move farther away from the subject. The greater the distance between the subject and the camera is, the shallower you can make the depth of field.
Format Size
This factor isn’t something you can change easily cause it’s the size of your sensor or film you are using, but it does affect depth of field so I figured I’d mention it. The smaller your format size, the greater the depth of field.
You may have noticed that it’s hard to get this effect (sharp subject, out of focus background) with a standard point-and-shoot camera. These cameras have small sensors, and their aperture range is generally around f/8 – f/11. It’s also likely that you’re standing close to your subject cause your zoom is limited. But this actually works out well for most people because everything in the shot is in focus, provided there is not any motion blur.
Examples of Depth of Field
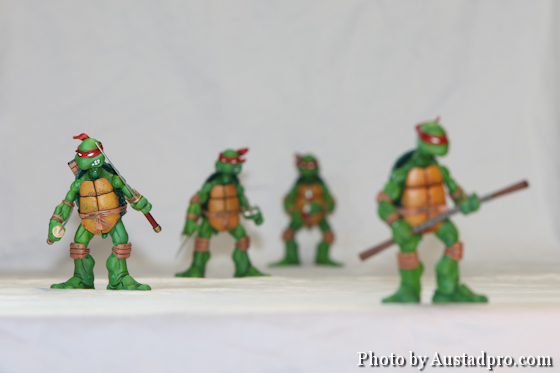
Below is a series of photos showing a change in the depth of field. The photos are taken with a focal length of 200mm. I started the aperture at the widest aperture opening for this lens with is f/2.8. As I step down to the next f/stop the light passing through the lens is cut in half. To compensate the shutter speed is opened twice as long to keep the correct exposure. This relationship between the aperture and shutter speed is explained more in a previous blog post about the Photographic Triangle.
Pay attention to how the depth of field changes as you close the aperture and make it smaller. You can see the depth of field range expand and more of the image is in focus.


